Here are two balls of hand painted yarn. yes, I painted them myself. The process was simple. I first unwound the balls of store bought, cotton yarn onto a skein winder, then I tied the skeins so they wouldn't come tangled. I dunked them in plain water, applied the textile paint & allowed it to sit for a while so the yarn would absorb the paint. Then, I laid them out in the sun to dry. Once dry I zapped the yarns in the microwave for 3 minutes each. Next, I rewound the skeins back into balls. The longest part was waiting for the yarn to dry. It takes a hot sunny day for best results. The paints make the yarns a bit stiffer than dyes do because the paint sits on top of the fibers instead of becoming part of the fiber like dye would. I found a source for natural, plain yarns to dye or paint. I'll probably do this again.
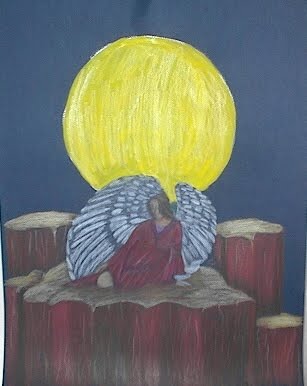
There Are Angels
Colored Pencil Drawing
Monday, May 24, 2010
Painted Yarns
Here are two balls of hand painted yarn. yes, I painted them myself. The process was simple. I first unwound the balls of store bought, cotton yarn onto a skein winder, then I tied the skeins so they wouldn't come tangled. I dunked them in plain water, applied the textile paint & allowed it to sit for a while so the yarn would absorb the paint. Then, I laid them out in the sun to dry. Once dry I zapped the yarns in the microwave for 3 minutes each. Next, I rewound the skeins back into balls. The longest part was waiting for the yarn to dry. It takes a hot sunny day for best results. The paints make the yarns a bit stiffer than dyes do because the paint sits on top of the fibers instead of becoming part of the fiber like dye would. I found a source for natural, plain yarns to dye or paint. I'll probably do this again.
Sunday, May 23, 2010
A Shawl
Aside from some practice pieces, this is my first official woven project. It's a 24" wide shawl in wool yarn. Its about 5 foot long. It should have been a little longer, the target length was 6 foot. I'm still working on getting the right length to things. But, it does go around the shoulders nicely.
The photo below shows the detail. It uses a pick up stick design of 2 up & 2 down. It was fairly simple to accomplish & took about 4-6 hours to weave.
More to come, Stay tuned . . .
Friday, April 30, 2010
Christening Gown
Here is the christening gown I just finished making. Its made of 8mm silk haboti, the type of silk used in silk painting. This piece looks like a 2 piece dress & coat, but its actually a one piece gown, the the coat front attached to the back. It also has little embroidered flowers on the collar. It didn't give me too much trouble to make, expect for the "2 left fronts" I acidently made at first. I had to take out the lace & facing on the right side of the coat & turn it to correct it in order to have a right side & left side of the coat. I hope that made sense. Its from a Martha Pullen pattern. The last photo is the full view, the first is the detail & the second is detail of the closing on the coat. I don't have anyone in mind to give the outfit to, just made it to see if I could pull it off-- and I did, to my surprise.


Sunday, April 25, 2010
Weaving Again
A couple of weeks ago I purchased 2 weaving looms, small ones, an inkle to produce bands & a 24" rigid heddle loom. Weaving is something I used to do some 20+ years ago & I've thought about going back to it for some time, so I did. I'm really rusty at it, so much so that I feel like a beginner- again. Once I get good at regular weaving I'll try the fancier stuff like patterned pieces & weaving on multiple heddles (those are the things the yarn/thread warp goes through to lay in the weft (the horizontal threads, the warp goes longways of the thread) Here is my first project, both on the loom & finished. Its a scarf, woven from regular sport weight yarns & it took about 2 days to produce.


Tuesday, April 13, 2010
A quilt from a Photo
While a quilt made from a photo is not unusual, all of the blocks in this particular quilt are made from the same photo.The little quilt also has embroidery on the edges & the corners. Here are the details, the whole quilt & the photo from which the blocks were made. The first photo is the one from which the blocks were made, using a kaleidoscope software. The other photos are of the quilt, the embroidery details & of the block itself.


Wednesday, April 7, 2010
Shopping
When I'm between projects, I tend to get antsy, pacing around the house, reading though old magazines, anything to keep moving-- until I find a new project to do. Sometimes- most times- a trip to the local quilt shop will provide me with inspiration for another quilt or sewing project. Yesterday I went to the local shop to buy fabric to finish a "pink Floral" kaleidoscope project that I'd printed out using a single photo on kaleidoscope software. That photo was of dogwood trees blooming, hence the pink. Before I got out of the shop, I'd spent too much $$ & had not one but 3 more projects lined up to do. I'll spend today cutting fabric for the pink quilt & trying to figure out the other 2 projects. Gotta go & cut fabric now.
Monday, April 5, 2010
Air Applique & the "Headache" quilt
This is a recent project done in the technique of "air applique" where there is no base fabric to stitch the applique pieces to, you just overlap the seam allowances & stitch the pieces together. The second photo, on the right, is a painting using the same, albeit smaller, sketch used in the quilt. I plan to show them together at the upcoming spring show, May 15. The project was indeed challenge & left me with a headache, trying to figure it out. The technique came from Barbara Olson's book, "Journey of an Art Quilter". The project took about 2 weeks to complete, the quilt is roughly 48" x 60" and the painting, acrylic, is 24' x 36".

Subscribe to:
Posts (Atom)