You may be wondering how I make an art quilt/ What is my method of choice? Several have asked, so here is my method for making an art quilt.
1. Make a sketch, refine the drawing into something that can be easily enlarged. It should be just a black & white line drawing without extra stuff in it.
2. Enlarge that drawing into the size you want to make the quilt. You cab take it to a copy shop for enlargement, redraw it onto large format paper, I use bulliten board paper from a local school supply store that comes in rolls 48" wide, or trace the drawing onto a transparency & project the image using an overhead projector, if you have one. Sometimes these can be borrowed or rented from a library or school.

3. Mark the front & back sides of the enlarged as such, this is important to tell the front from the back of the drawing.
4. Also make a few copies of the original drawing for color studies.
5. Once you have the color studies done & have decided on a color plan, turn the enlarged drawing over to the back. Trace the entire drawing again. I use a different color marker on the back to differentiate the front from the back.
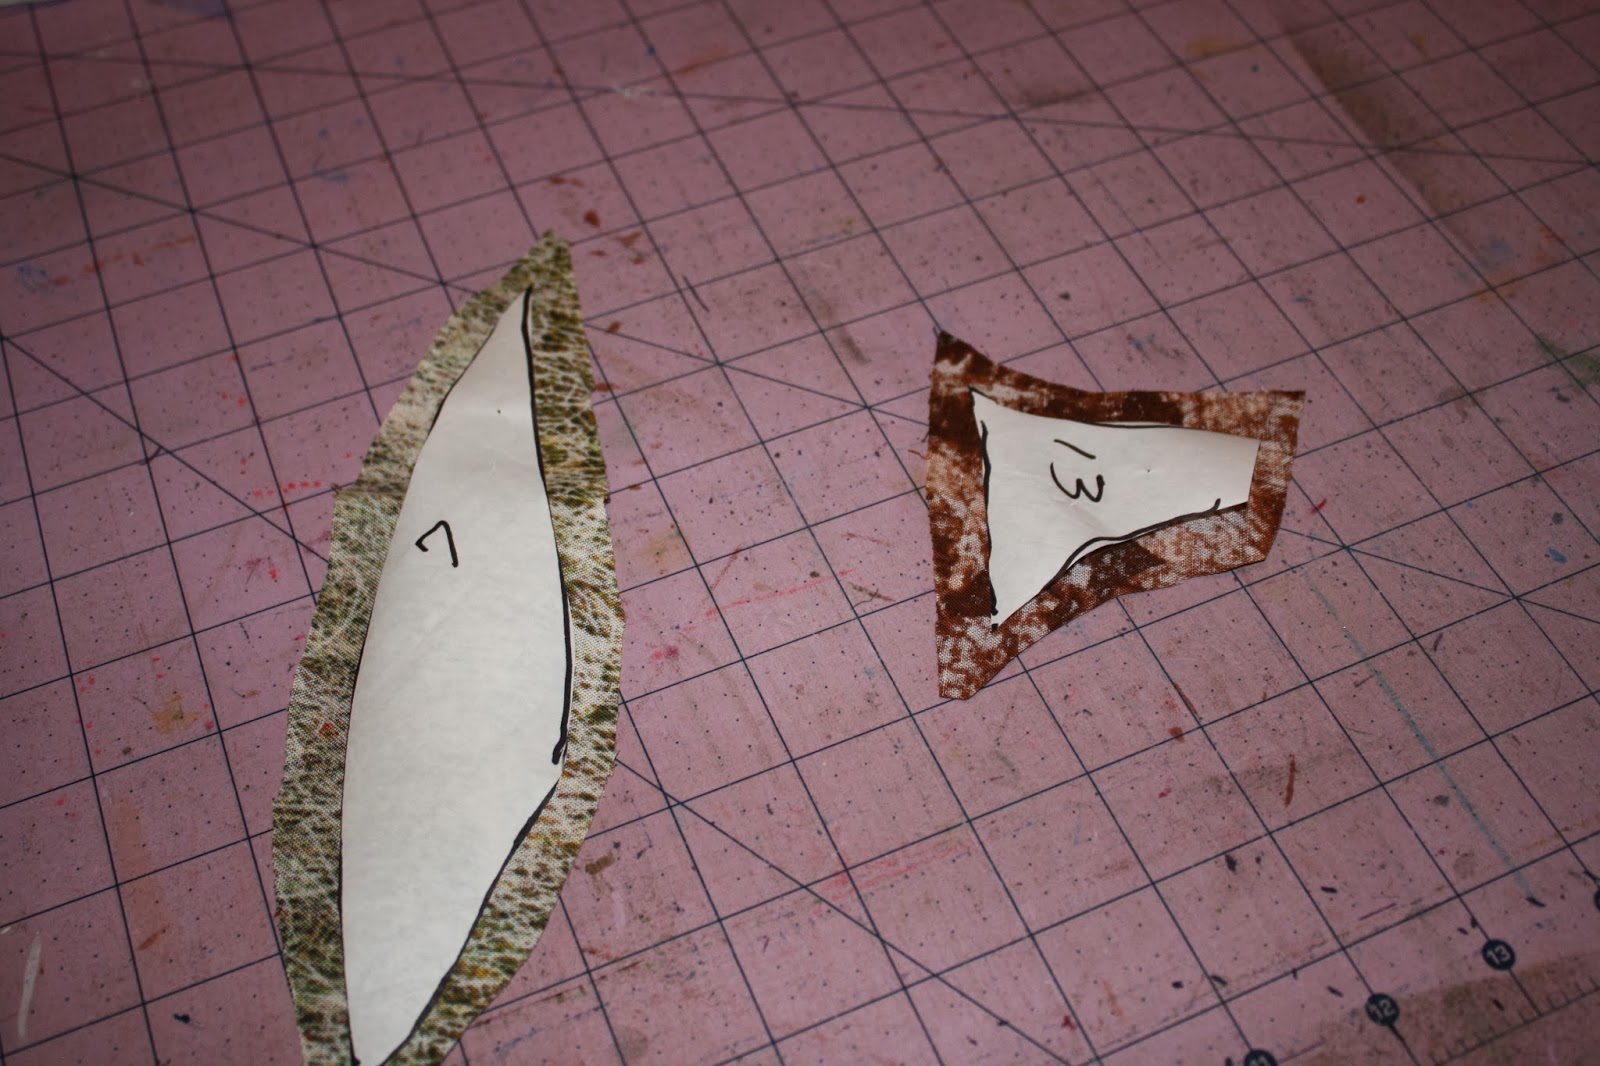
6. On freezer paper, trace the drawing again. Place hash marks (//) across adjoining lines on each each section of the drawing. These are registration marks for lining up the pieces correctly on the quilt top.

7. On the front of the enlargement, mark each section of the drawing with a number or letter, (1,2,3 or A,B,C) them mark the same sections of the freezer paper with the same letter or number as on the enlarged drawing. Be sure they all match.
8. On a base, muslin, interfacing, stabilizer, etc., trace the image again from the enlargement by placing the base over the enlargement & tracing. Be sure to mark all the sections with the letter/number matching that on the enlargement. You are done with the enlargement for now.
9. Select fabrics according to the color scheme. For this type of quilt, where the design is the most important, tone on tone, batiks, & such work best. Large scale prints are not always a good option since they draw the eye away from the design of the quilt.
10. Once you have selected your fabrics, you can carefully cut apart the freezer paper sections of the drawing. Remember these are traced from the WRONG side of the picture.

11. Now you can press the freezer paper sections to the fabrics chosen for each section. Press each freezer paper section to the BACK of the selected fabric. Cut each section out, a few at a time, leaving about a 1/4 inch margin from the freezer paper on all sides. This is your seam allowance.
12. Working from the CENTER, lay out the pieces of fabrics matching the number/letter on the piece with the corresponding section on the base drawing. Pin them on,determining which piece will lay on top of which piece/ which will overlay & which will underlay. The piece on top will have the seam allowance tuned under for a smooth seam. (Ignore this if you are sewing the pieces together in the usual manner).

13. If you use an overlay method to attach the pieces to the base, either press or glue stick or baste down the top overlay for a smooth edge. If the piece is curved, clip the curves so the piece will sew down flat. REMOVE the freezer paper & pin the section to its'
corresponding section on the base. There are numerous posts onlins or on YouTube that show this method.
14. Now you can begin to stitch down the pieces to the base. I use either a corresponding color thread, a monofillament(clear) thread, or a neutral thread that won't show up much. If the stitches do show more than you like, color over them with a marker of the same color as the piece.
15. Once the stitching is complete, quilt & finish as desired.
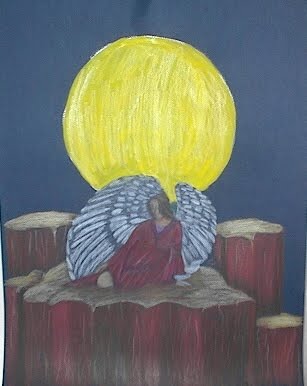
The photos shown here are a work in progress, I will post the photo of the completed piece once it's finished.
Congratulations! You have made an art quilt. I hope this little tutorial explains the method to the madness & it can get maddening sometimes. Enjoy & let me know what you think.